Tuesday, November 5, 2024

Adventuring as a widower in a classic Sportsmobile Camper Van.

 I have been silent for far too long on my blog, dealing with many complications of life, and honestly I just needed a LOT of time to recover me.

You see since my second to most recent post, back in March 2018, I went through the year of h*ll, which was 2018. Between my wife and I, we lost 20 close friends and family members, including my Dad, her Dad, her brother Eddy, our niece Lisa, the second friend I ever introduced her to while we were dating. I had to support my wife as she ended up hospitalized twice during 2018, to which her company followed up by laying her off shortly thereafter like the two were unrelated... 

We worked to recover from that, which was difficult but we made it, then COVID hit. 

And in July of 2022, Debi got sick, a Telehealth visit after hours said it looked like COVID and get to a testing center the following day.

The following day was July 19 2022. Debi passed away at the ICU that afternoon and NOT from COVID. 

The story is long, and I am still angry, angry that at the time health care providers were calling every symptom COVID. That test meters failed to show high blood sugar, and angry that neither of us thought it was serious enough to take her to the ER sooner. 

I have since as part of my recovery process, gotten myself an old Ford E250 Sportsmobile camper conversion van that I have been fixing up and camping in.


I have spent considerable time and effort fixing this old van, replacing pretty much everything on the front of the engine that spins, replacing the exhuast, tires, brakes, radiator etc... and updating the RV systems with a new fridge, Lithium Iron Phosphate RV battery, a BIG one, and compatible charging, 

My electrical setup here that has been changed and integrated into the existing Sportsmobile system or replaces parts of it are...

  • CHINS Bluetooth LiFePO4 Battery Smart 12V 400Ah Lithium Battery - Built-in 200A BMS Amazon Affiliate Link.
  • ATEM POWER 40A DC to DC Battery Charger with Anderson Plug Reverse Charge Solar Input MPPT for AGM, Gel, Calcium, Lead Acid, LiFePO4 Batteries of 4WDs, RVs, Campers, Trailers On-Board Charger. I wish I had bought the 60 amp model although this works well enough. Amazon Affiliate Link
  • Bussmann CB285-60 Surface-Mount Circuit Breakers, 60 Amps. I tried the Chinese breakers at first. Do yourself a favor... don't bother. Awful experience of repeated failure. Amazon Affiliate Link. 
  • Powermax PM3-55 RV Power Converter. 110V AC to 12V DC Converter Charger to support Lithium batteries and replaced OEM 45 amp lead acid only converter charger. Amazon Affiliate Link.
  • Dokio 300w 18v Portable Solar Panel Kit. I  have 2 of these giving me 600w of solar charging. Amazon Affiliate Link.
  • Dokio Solar Panel Mounting Bracket. Basically kick stands for the portable panels, you need these to keep the panels aimed at the sun. They come in a 2 pack and I have 2 sets so 4 to support my panels. Amazon Affiliate Link.
  • 2 50ft SAE 12awg extension cables. These allow me to park my van in the shade, and put the solar panels in full sunlight. Amazon Affiliate Link.
  • 25' 8awg black / red bonded hookup wire. This allow connection of the panels to the charger via 50 amp Anderson connectors. Amazon Affiliate Link.
  • 50 amp Anderson Connectors. This allows me to create the parallel cable to connect the solar panels to the van and in turn to the MPPT controller. Amazon Affiliate Link.


The solar pass through. If I were to do it over. I would do the same Y cable. and a sheet mteal block off plate sealed and painted, and then cut through for a weatherproof Anderson Connector flush mount and copious amounts of silicone sealant... Amazon Affiliate Link.

Adding a fully modern CB radio with AM, Sideband, and the newly authorized FM modes. 


I am still working on the woodworking shop and DIY stuff, but most of this is to serve the function of supporting my off road and camping addictions... So the Youtube channel has been spun away from Daves Workshop and into Wildersport. 

I am committing now to diving into Wildersport full force, so look forward to seeing more posts, and more videos. I will be improving as I go along, I hope... and with any luck I will be able to provide you with some good information and entertainment along the way. 

Thank you for joining me on this journey!

YouTube Channel, Affiliate Programs and a new TeeSpring store!

 It has been a while since I have posted to the blog, but that is about to change. It is time for me to get serious about Wildersport and dive head first into making this a going concern.

Wildersport was a shared dream between my late wife and myself, and I have been working on upping my game via the Youtube channel, and starting to develop some merch to sell and just have a good go at it, so here it is.

For those of you that want to follow my adventures between long delayed blog posts here goes.

My Blogger address is http://www.wildersport.biz/

My youtube channel is at... https://www.youtube.com/@Wildersport

My amazon affiliate page is at https://amzn.to/3YAxVCH

My Teespring store is at https://storewildersportbiz.creator-spring.com/

My current concentration is on getting my 1993 Ford Econoline 250 Sportsmobile Pop Top camper van 100% road trip ready and modernized at least to the interior tech, while retaining the classic straight 6 powertrain that is not fast but is oh so reliable...

So come along as I journey through healing, growth and adventure that can only be found with faith, family and four wheels!

Sunday, March 4, 2018

Brand name gear fail. Coleman Pack Away camp kitchen.

First things first, full disclosure, the Coleman Pack Away camp kitchen that we own was purchased probably 12 years ago. However it is ben very lightly used, and stored dry, never exposed to anything aside from normal southern humidity that, well everything around here is exposed to.

The Coleman Pack Away camp kitchen is a well designed, well thought out compactly foldable little table with just the right tack on thing a ma bobs to be really handy on a camping trip.

The entire thing folds up to roughly the size of a long laptop bag, and folds out to provide ample food prep area, with a perfect spot for your Coleman liquid fuel camp stove.

There is an adjustable height pole with hook for hanging your lantern, An upright, well goal post sort of thingy with 5 S hooks that are ideal for hanging your cooking utensils for easy access, and a mesh "shelf" under the table top for holding your camp dishware. All in all a fairly good setup for keeping the family fed on those trips where the campground picnic table is going to be occupied...

There are 2 areas where this camp kitchen fails, and does so pretty massively.

The first, and it's a pretty major flub from Coleman considering they sell WAY more propane stoves than liquid fuel these days, is that there is no suport for a propane bottle, or hose, so if you are using a propane stove, YOU will have to MacGuyver some way to support the fuel supply.

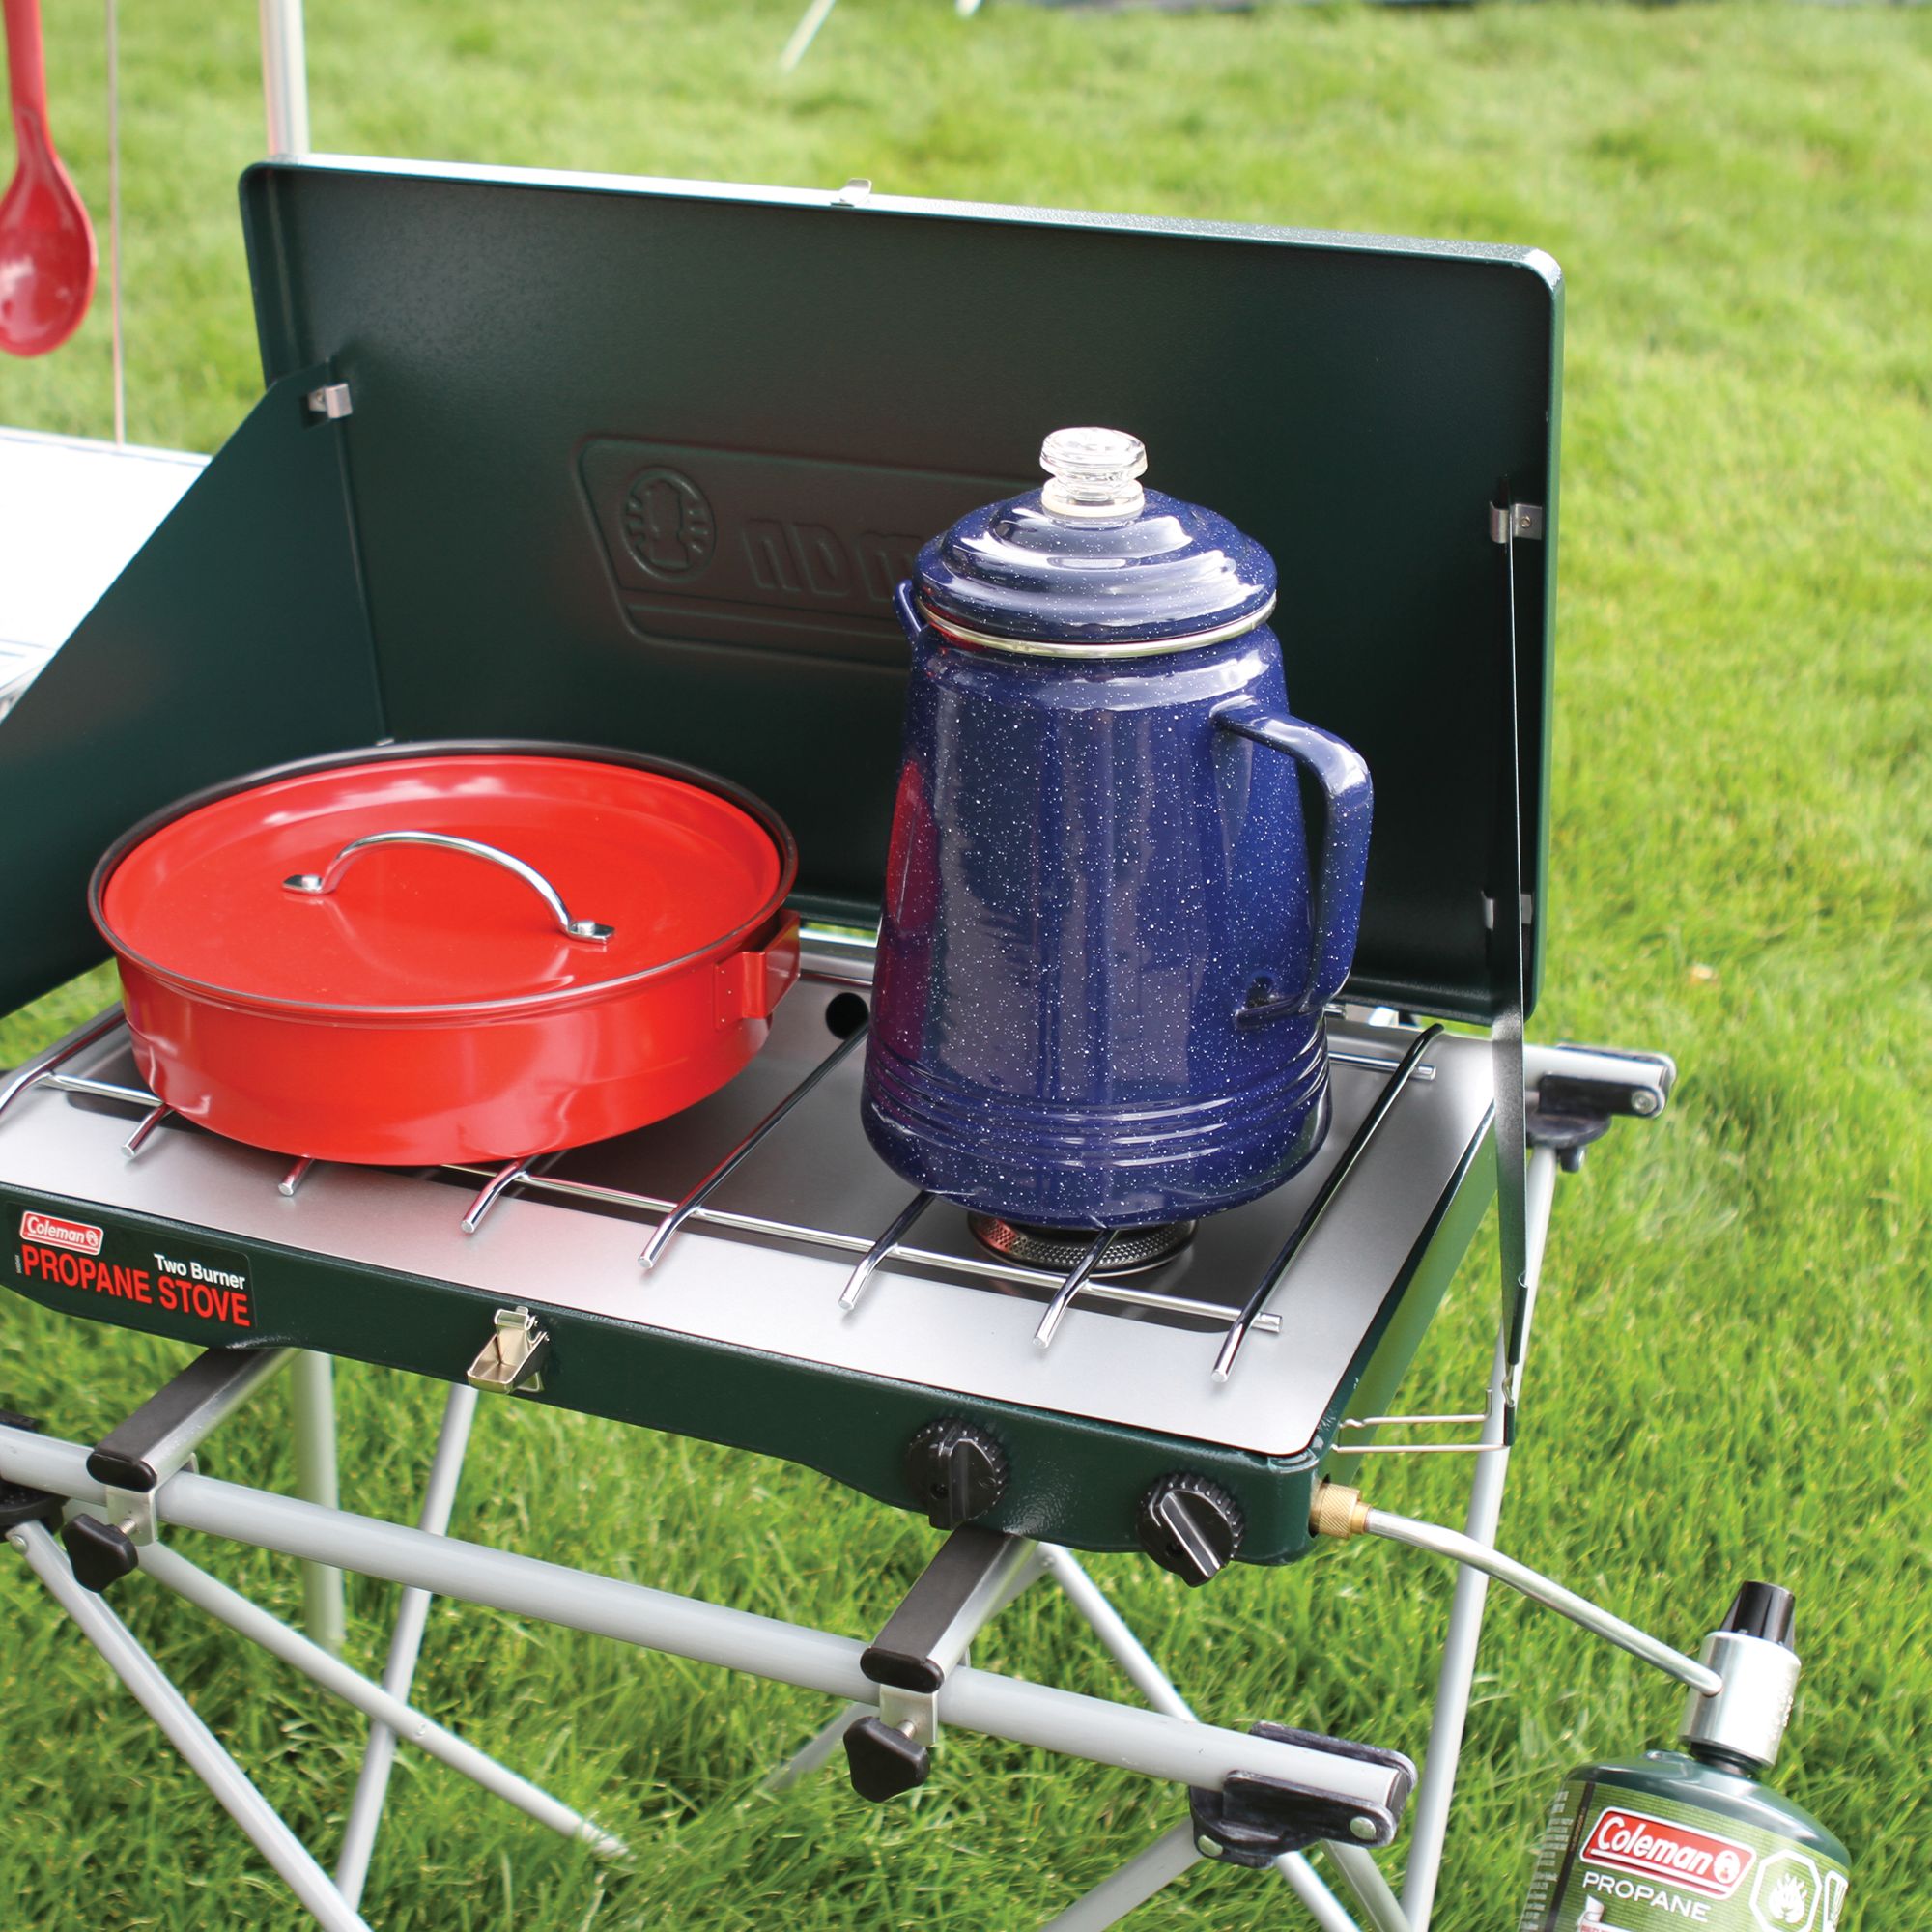
Coleman's own product photography shows the product being used with a propane stove, witht he fuel bottle just hanging off the regulator in mid air. This puts a LOT of leverage on that aluminum line. At best, this will over the long term, cause the regulator line to bend. At worst, it can cause a fuel leak while the appliance is in use, causing a fire, or potential fuel explosion. Long story short, DO NOT USE YOUR STOVE LIKE WHAT COLEMAN PICTURES!


I've talked about this in some of my videos in the past, I use a hose / bulk tank rig, and I support the hose with the legs of the table to keep pressure off the fuel regulator. 

You can see where I discuss this in my description of the Brinkmann Stainless Steel 2 burner camp stove. 


The second, and more annoying to me issue is one of quality of materials. The framing is high quality aluminum, the legs etc.... all are well made, it's the laminated MDF top pieces that are, well an incredibly poor choice of materials for any sort of durability in an outdoor envioronment.

In the case of mine, less than 3 camping trips and years of storage have resulted in tops that are badly bowed in, and in need of replacement.

Now I could just replace the unit, but let's face it. I am going to end up with EXACTLY the same problem. So instead, I am looking for inexpensive, sufficiently large plastic cutting boards that I can trim to fit, and then get busy with a router, power drill, and riveter, and modify this. I seriously doubt coleman left me with a lwide enough slot to do it internal to the frame, so I will just tack them over the outside... But I have yet to find a suitable cutting board....

In the mean time, I use it as is... but I am honestly not really thrilled iwth the quality corners that were cut...

Long story short, I do not really recommend this unless you are going into it knowing the shortcomings, and are willing to address them on your own.

Top surface replacement options could be any of a myriad of plastics, aluminum, or even if you have the funds, stainless steel.

Best of luck, 

Sunday, February 25, 2018

Should I spend more to buy the brand name gear?

It really never ceases to amaze me how often I see this question. It's not unique to camping gear either... But for the sake of this blog... we are talking about camping gear...

The anser is pretty complex, and really is, maybe, maybe not. Let me explain...

The big issue, is what item specifically are you talking about?

Is it fairly complicated, or likely to need service or replacement parts sometime in the future? Things that need replacemen parts are things like camp stoves, lanterns, grills etc...

If the answer is yes, then absolutely you need to buy quality brands. Specifically, and I don't want to sound like a brand snob here as they really are middle of the road cost wise, but Coleman products have great reliability and parts support, but to top it off, I will give you another example...

Tents...

I have a large number of tents, from different manufacturers, they are...

Coleman
Stansport
TexSport
Eureka
Sierra Designs
Swiss Gear
Ozark Trail.

There are 3 of these brands that stand up well to foul weather, and hard use. They are, in ascending cost category...

Coleman
Eureka
Sierra Designs.

I cannot personally attest to the truth of this, but there have been enough stories written up about it I tend to believe this, but the Oaark Trail tents are reportedly only intended, and supported by their manufacturer for use in ideal weather, and make no claims whatsoever about storm worthiness.

The Texsport, well, that thing is a joke. The poles are so thin they basically fold under and collapse with the slihgtest breeze.

The stansport tent in all honesty has been durable, and held up to lots of use, but even with lots of seam sealing, it leaks like a sieze under a hard rain.

Same goes for the Swiss gear. VERY sturdy construction, but with the complicated design with a huge number of seams, it leaks, badly, under a Texas spring rain storm... Not much fun to be trying to sleep with a steady stream of rain pouring on your head...

Mind you, there are some very innovative ideas going on with these brands, like Ozark Trail has the Dark Rest tents, that do a great job of blocking out sunlight, and much heat gain at least early in teh day, as well as some models in the past have had AC ports for literally using a window unit Air Conditioner in your tent! I know camping purists hate the idea, but let me tell you, as a camper in Texas, I LOVE it...

On some other items, the differences may or may not be so vital. For example my family cook set is Ozark Trail branded, but really a rebranded Texsport set, that I have had for 14 years now, with only one issue, and that is that a pot metal wing nut and screw rusted up and broke, easily replaced at Home Depot, although I had to trim the screw short to match the original, and yes the metal is thin, but judicious use of heat settings and all is well with my cooking, and cookweare... And ithe whole set weighs about 1/4 of what one cast iron skillet weighs...

This whole issue has been brought up to mind most recently, not by a lower cost alternative, but a brand that just isn't standing behind their product. At least not the way their competition does...

I am talking about Brinkmann. You see back in late 2004, early 2005, I bought myself a beautiful 2 burner propane camp stove, but not just ANY 2 burner propane camp stove. I bought a Brinkmann because, it was priced right about where Coleman had their self ignition model, but the brinkmann had a feature that the frequent beach camping I was doing then called for. Stainless steel construction.

Now I've going on and on particularly in my videos about how much I dislike 1lb propane cylinders. About the risks they pose in the waste stream, how much more expensive they are than either liquid fuel, or bulk propane etc... I would never knowningly buy any propane appliance that I could not run on a refillable bulk tank.

Well the first time I hooked a bulk propane tank hose up to the regulator of the Brinkmann, and turned the gas on, the regulator simply quit working. The stove was new, and Brinkmann send me a replacement regulator. Fast forward some years, and I am looking for a replacement regulator again... None to be found anywhere.

Now mind you, regulators for Coleman stoves have pretty much been the same for, well my entire long lifetime. I can walk into just about any sporting goods store that sells campign gear, or a Walmart, Target, whatever, even many grocery stoves and buy a replacement regulator for a coleman, and be assured it will fit and work...

So long story short, it's not really the COST of the item that makes the difference, but rather the company, and the care they give the customer after the sale, long after the sale that make the difference... I mean if Brinkmann had been usable, and maintainable, not only would I have bought a second stove from them for more in depth trips, but I would be recommending them due to the stainless construction. but since they are, well planned obgsolescence, I am not doing business with them from now on...

Too bad. I really like my shiny silver stove...

Friday, April 7, 2017

What Wildersport Outdoors is all about, and unboxing an iRegro wood gasifier stove.

A quick video about Wildersport Outdoors, what we are all about, and the unboxing of a pretty cool new wood gasifier backpacking stove.


Mr. Heater Portable Buddy pilot fox.

So our mr. Heater portable buddy that we use camping fishing in the shop pretty much everywhere finally decided that the pilot wasn't going to work we did a little research and found the fix here it is to share with you.


Reliable camp lighting.

We've been through many interations of camp lighting over the years, The experiments were
  1. Propane lanterns
  2. Flashlights
  3. Mag lights in lantern mode
  4. Headlamps
  5. kerosene lanterns
  6. White gas / Gasoline lanterns
  7. Butane lanterns.
  8. Candle lanterns
  9. and most recently. The Tac Light lantern. Those super bright LED lanterns.
All of them have their advantages, and disadvantages. And just like the liquid fueled / gasoline / white gas stoves, we come back to white gas / gasoline every time.

Simply put, While the tac light lantern is a good lantern, there are many imitators, and the light, well, it's too stinking bright close up to be anything but blinding, but does not disperse well enough to make a good area light.

Propane has proved over the years to be expensive to use with any frequency, especially with the fuel consumption that we deal with in propane lanterns. 

Kerosene works well, but produces too limited of a light be to useful beyond a small camp kitchen, or a tent / cabin room. And considering the fuel isn't used on anything we own other than the lantern, it is a bit hard to give serious consideration to use... Having said that, if I could re jet the stove to use Kerosene, it would be a GREAT option for international travel. And with a stove like the MSR XGK you can do just that. Kerosene is readily available pretty much anywhere so you would never need to worry about fuel but...

As we prep our gear for the spring camping season that is almost upon us here in Texas, we are getting the gas lanterns ready White gas is hard to find outside of the US and Canada, but unleaded gasoline is readily available. SO a dual fuel model makes for great fuel availability. 

Our prep work as you might recall includes testing for leakage, and doing a pre burn at home to insure that the lantern lights and operates. We have two of them, one of which had a failed pump seal that was easily replaced with parts from our local big box retailers sporting goods section, and it simply took a few starts to clear the cobwebs out.

It should be mentioned that we stocked up on fuel a long time ago, thinking white gas would go through fairly quickly. We did not find that to be true.

In real world use, we would burn up 2 1lb propane cylinders in a 24 hour period in the lantern. We could fill up the white gas lantern 8 times with a 1 gallon can, and each fill up lasted for 2 days. 

The results in fuel usage are similar with the stove. Have we made our point clearly enough on why we chose gasoline / white gas over propane yet?

So now that the lanterns are ready to go and stuffed back in their cases, we await delivery of our replacement packings for the stove, and we get that leak fixed, and we are ready to go.


Saturday, March 11, 2017

Pre-trip prep things to check on your camping appliances.

Something not often covered but far too often discovered while at camp is that your appliances have some sort of issue.

You are most likely issue is going to be a leak of some sort. You should know how to detect and possibly fix those leaks.

With liquid-fueled appliances leaks tend to be readily apparent. On stoves you typically see fuel pooling up in the little recess where the pickup tube comes out of the tank. Or the tank simply will not take pressure due to either a bad pump or a bad cap.

If you see fuel pooling chances are you will likely be able to see where it is coming from. The most likely culprit is the packing behind the valve stem nut this is a piece of graphite that does tend to go bad over time. To fix this you can try to turn the valve wide open and then using 1/2 inch open end wrench simply snug the nut down a little at a time no more than 1/8 turn.

If it is a bad cap he will smell fuel leaking from around the cap and quite possibly see fuel leaking down the tank near the fill cap The fix there is to Simply replace the cap.

A bad pump is usually do to the leather cup getting dried out and shrinking you can try rehydrating and swelling that cup by removing the pump and soaking the leather cup in vegetable oil for about an hour or so. Then reinstall the pump and try generating pressure in the tank. If that fails a new pump repair kit is in order they are inexpensive and readily available get many retailers.

Propane and butane offer a unique problem. Since we are addressing car camping in this post I'm not going to go into the issues of butane as it is a very Cod fuel to use for out of the car camping and more commonly used for backpacking.

Determining where or even if propane is leaking can be far more complex then determining if liquid fuel is leaking and it requires additional equipment to run a test. You will need a household spray bottle filled with soapy dishwater the idea here is to spray around any and all joints and fittings where the propane runs if the propane is leaking the soapy water should bubble up so make sure you use enough soap and that it is the kind that gets very sudsy.

To run the test make certain you are outdoors and no where near  any sort of ignition source  then simply attach your fuel bottle or line to your Appliance and spray down the joints where the bottle screws in where the valve that operates the fuel flow is and look for any bubbles. Open the valve slowly and continue the test spraying around the valve until the valve is all the way open and then close the valve make sure you don't see any bubbles other than what you expect to see was just soapy water.

Depending on the manufacturer and the model of the propane Appliance in question you will likely need to Source up whenever components you find leaking if they are available. We have found with Coleman, Zodi and Century appliances that Parts availability tends to be fairly good. Other brands can be hit-or-miss. Sometimes all you need to replace is a simple rubber or cork gasket comma sometimes it's an entire valve assembly or even a regulator. This is just part and parcel of taking care of your equipment.

It should be noted that with proper care there is no shortage of late 1940s and early 1950s camp stoves that have been cared for and lovingly used by generations of the same family. The build quality today is no better or worse than has been in years past thankfully. With appropriate care and maintenance you can expect you're Camp appliances to provide great service literally for decades.

It should be noted then we our cells have had to replace a valve stem packing on our Coleman 424 stove and a pump rebuild kit on one of our premium fuel lanterns. We also have a leaking fuel control valve on a Century single burner camp stove that we got in the 1980s. We are not planning on fixing that particular stove since the replacement part cost more than the stove.

Hopefully the information we've provided here today has been of some value to you. Before you fully rely on this information we encourage you to seek out Diagnostic and repair information from your specific Appliance vendor. They can be very good at helping keep your equipment running in top condition with maximum safety.

Somero you've got the information hopefully you've taken care of your equipment so get out there and find your own Road Less Traveled.

Wednesday, March 8, 2017

Setting up your camp kitchen part 3. Selecting a camp stove,

So you want to actually cook, not just grill or stick hot dogs on a stick over a camp fire for a weekend of camping. You are going to need a stove for that.

You have decided you are going ot do out of the car camping. So ultra light single burner butane stoves probably aren't for you either...

Nope, you need a good 2 burner camp stove. But there are so many options out there. Let's compare the main types side by side and give you the options, and a bit of a story behind why we prefer one over the other.

When it comes to full size camp stoves, 2 burner jobs, there are 2 main types. Liquid fuel, and propane. Yes there are other compressed gas types but propane and liquid fuel are the MAIN types you are going to run into here..

Each type of stove has its advantages, and disadvantages, let's run down the list...

Advantages.

Liquid Fuel:

  1. Reliability.
  2. Environmentally friendly fuel consumption.
  3. No waste cartridges.
  4. If using unleaded gasoline, fuel is available pretty much everywhere 
  5. Parts readily available to repair if needed. Little down time.
  6. Performance does not reduce in cold weather. 
  7. Impress your family, friends, and fellow campers with an almost steam punk sort of retro tech.
  8. Fuel readily available if using unleaded gasoline, when travelling outside of the continental U.S. You might not be able to source up, or carry your own propane accross the borders... 
Propane:
  1. Lower initial cost.
  2. Easier to use / more intuitive use.
  3. More compact overall dimensions for similar cooking capacities.
  4. Greater number of options of manufacturers and models. Including some Stainless Steel models.
Disadvantages:

Liquid Fuel:
  1. Higher initial cost. As of March 8 2017, on amazon.com, the Coleman Guide series dual fuel stove currently retails at Amazon for $89.36 The Coleman "Classic" 2 burner propane stove retails for $42.95, so the liquid fuel model retails for just over double the propane appliance cost.
  2. Coleman branded Fuel, as it is called, can be hard to come by in gallon cans at certain giant international retailers, and the cost is typically. There is another national brand they seem to carry called Crown Camp Fuel in the gallon cans. I can not attest to the quality of Crown, but have used Walmart's own house branded Ozark Trail Camp Fuel for years. (No longer available). I suspect that is / was Crown in a different can.
  3. More complex fueling / lighting procedure. Not a big deal once you get used to it, but if all you ever used camp appliance wise is propane / butane appliances, liquid fuel is going to come as a shock.
  4. Fuel spills into clothing leave a stink, and can irritate skin. PLUS if you spill camp fuel on yourself, you will want to steer clear of the camp fire!
Propane:
  1. Lower reliability. I have had to replace pressure regulators on one camp stove 3 times in 2 years due to leaks.
  2. Sensitive to canister pressure, many stoves will only work with 1lb canisters, using them with a tee off of a 20lb tank for example can damage your regulator (the first one that broke!).
  3. The seals tend to dry out, and unlike liquid fuel stove seals don't respond well to soaking in vegetable oil. 
  4. 1lb propane canisters, even when no more fuel is escaping, contain enough potential energy to explode violently if heated. Many jurisdictions consider them hazardous waste making them difficult to dispose of properly.
  5. Propane functions off of the pressure difference between the tank and the outside air. At lower elevations and at sub freezing temps, the pressure differential can be zero, meaning the propane will stay in the cylinder. A liquid fuel stove would simply require a few more strokes of the pump to generate that pressure difference. 
  6. Considerably higher total cost of fuel when used semi, to frequently. A gallon of camp fuel, typically is equivalent to if I recall correctly 8.5 1lb propane cylinders. 
There is some debate among owners, and Coleman themselves states that their fuel only lasts a maximum of 7 years in proper storage, but to be honest. I think their numbers might be conservative as there is plenty of anecdotal evidence that people are using 20 + year old Coleman fuel and similar white gas fuels with no ill effect on their appliances.

Long story short, use your own decision making power. For me, the lower total cost of ownership, combined with fuel availability internationally in the form of regular unleaded if need be, and the easy as pie reliability of a dual fuel / liquid fuel stove vastly outweighs the ease of use, and lower initial cost of propane appliances. Your needs and desires may vary. 

Not saying we don't own a propane stove. We do, but it is used for very limited applications where a liquid fuel stove won't be appropriate. I.E. the propnae stove is a Brinkmann stainless steel stove, that is great for beach cookouts where sand, salt, and wet air are the order of the day. but aside from that, it's liquid fuel for us all the way!

Setting up your camp kitchen, part 2. The morning cup of coffee.

Continued from Setting up your camp kitchen, part 1.

As you continue setting up your camp kitchen, there are must haves, and nice to haves, and what was I thinking items. Depending on your sensibilities, the definition of must have can be pretty broad, so with that said, let's dive in and talk about the gear.

I should mention that where possible, I WILL steer you away from anything that touches your food or beverage when hot that includes either plastics, or aluminum. The health concerns of both of those materials are well documented and long standing. I do have safety / durability concerns with glass as well, but will select glass over plastic almost every single time. In a later post we will discuss glass food storage containers.

#7. Coffee making equipment. No morning for me is quite complete without a good cup of coffee. When I first started out of the car camping, I would boil water in the regular cook pot, and dunk a Folgers Coffee single into a mug and steep it like a tea bag. The results were barely adequate at best, and honestly, I think cowboy coffee where you use your teeth to filter out the grounds provided better results. Through many years of trial and error, I have found 2 solutions that work well, but may or may not be your cup of... well not tea in this case...

The first solution I tried that gave marginally acceptable results, was a Texsport stainless steel percolator. This is probably the most popular method for brewing coffee until the 1970s when the automatic drip coffee maker rose in popularity, but for most people, taking your Mr. Coffee tot he camp site was beyond unreasonable, so for camping, many of us, myself included, suffered through with percolator brewed coffee on camping trips. The flavor certainly is much better than the coffee singles approach, but once you get to drip brewed coffee, percolated coffee is, well... bitter. I don't mean to badmouth percolator brewed coffee, it's just not my favorite, HOWEVER, a percolator is super reliable, and even if your camp stove fails, you can brew percolated coffee on a camp fire which is an extra special experience.

In the 1970s, particularly the late 1970s, drip brewed coffee has been the norm for almost all coffee, except for when camping. I do not recall exactly when I first saw one, but in 2006 I discovered for myself the joys of owning a camping drip coffee maker that runs off of your camp stove. The Coleman Camping Coffee maker. It is almost a normal drip coffee maker, except the heat source used is from your camp stove, either propane or liquid fuel. It is designed to be used on the Coleman 2 burner camp stoves, but works on similar stoves, and I have seen it used in RVs, boats, and residential applications where there is a gas stove. My home brewer is a Ninja Coffee Bar, and while the results aren't as fancy, the quality is quite good from the Coleman, and the brew time is acceptable, On par with the old Black and Decker coffee maker I wore out. My only complaint is that the glass carafe always leaves me scared I am going to drop and break it far away from a source of replacements.

Fast forward to late 2016 when I learned about a stainless steel replacement carafe for Coleman's fancier propane fueled stand alone Quickpot coffee maker. It would appear the carafe is the same between the two. So my latest iteration of the coffee maker is the Coleman Camping Coffee Maker fitted with a Quickpot stainless steel carafe. This eliminates my terror of being coffee less on a camping trip. The remaining item I need to add to my coffee rig is a permanent filter to take the place of paper filters. I want to do what I can to reduce waste and excess use.

There is also the Melida Cone filter brewer. A simple funnel shaped to hold a coffee filter, and brew your coffee one cup at a time. I used one of these as my first home coffee maker when I got my first apartment when I moved out of my parents place. It works, reasonably well, doesn't use much space, and has the advantage of making you brew a fresh cup of coffee every time. It's not like you are going to be able to brew an entire pot at once. I guess you could, but it's not going to stay hot...

Another method for brewing coffee in camp is a French press, again for durability sake, I strongly advise if you do go this method, get and use a Stainless Steel model.

Lastly, if you are like me, and you love a hot mocha, or a good approximation of a cappuccino then a milk frother is a msut. Just like the carafe, the french press etc... you are going to want to have a stainless steel frother. One thing I found was in a clean protein shake shaker, milk froths up VERY nicely if you don't fill it up more than 1/4.

Of course you will need your supplies. For that I use old / reused 1lb plastic coffee cans. You will want filters, or your favorite permanent filter, coffee grounds, sweetener of your choice, milk, creamer, or even almond milk, and any add ins you would like such as chocolate or caramel syrup, whipped cream etc...

Now picture if you will, you get up before your spouse, go start up the stove, brew a pot Mexican Chocolate flavored coffee (It's a thing, if you can find it, do yourself a favor and try it!), froth the milk, and...

In a 20oz stainless steel vacuum tumbler add.
5 packets sweet and low.
4 oz skim milk, frothed.
1 oz sugar free chocolate syrup
Fill to 7/8 mark with coffee and stir.
Finish off with whipped cream and drizzle a few stripes of chocolate syrup.

See if you can get that into the tent to your spouse before you start drinking it!

Probably better make 2 at the same time to avoid that issue...

So while you are considering the coffee options, remember...

Get out there and find your own... road less traveled.


Amazon links to the equipment and supplies from this post. The coffee and sugar free chocolate syrup are not the lowest prices, but can be hard to find.

Friday, February 24, 2017

A quick word about the Amazon links used in our blog.

I have had a couple of people message me about the Amazon links on the blog, and the ads shown in the Youtube videos for this and the Daves Workshop blog / channel. Here's the scoop.

It takes time, energy, some but not much skill and financial resources to produce the content I am putting out here. To offset this and generate a positive financial standing so that we can keep producing content, and given enough of a positive result, produce more and higher quality content, we have decided to use Affiliate marketing links and display ads 

We would greatly appreciate your using our Amazon Affiliate links, as well as liking and subscribing to our Youtube channels. These things really do help keep us motivated, and heading the right direction.

At the time we post up Amazon links, you can be sure that the prices posted are the lowest prices we could find. 

It is our intent to find you the best deals we can with the resources we have,

In the months to come, we will likely be looking for additional opportunities to make this effort more self sustaining. We look forward to your support.

And for those of you that have already been supporting us through the Amazon affiliates, youtube advertising and other outlets, we would like to take this opportunity to thank you very much. Your support means the world to us.

Camping considerations for the heavy / obese camper, gear for the coffee lover.

Part of the reason behind our working this Wildersport Outdoors thing, is to use our love for the outdoors and outdoor adventures to get out, and get more active. Basically sneak in workouts without them being drudgery. And we have found in past experience, when we go camping, our diet improves greatly, and our activity level goes way up.

We both love camping, however as larger people, we have some issues with regular camping gear that cause certain concerns / considerations.

Any of you that have shared an airbed with your sleeping partner knows what happens when one of you rolls over, or gets out of bed, and it isn't pretty. So we wanted separate beds that we could scoot together in a sort of makeshift amber king bed. So we went and grabbed a pair of Intex 18" raised twin air beds. Unfortunately one of us is over the 300lb weight rating on the bed. Now the queen size of this same bed is weight rated at 600lbs, and the materials and methods seem to be identical aside from the scale of the mattress itself. So honestly, we are going to wing it.

I am planning on packing the Therm A Rest camp rests with us, in case my air bed fails due to my weight, and hoping praying for the best.

Sleeping bags obviously can be a consideration. Coleman, Slumberjack, and others make King size sleeping bags, the extra room is well worth the extra money. There are so many options and temp ratings I can't really link here.

The Therm A Rest Camp rest self inflating pads we have are over 25 years old, and out of production now. Once we find a suitable replacement I will link them here for your convenience.

We do have an option that would take more packing space, and space in the tent, but we do have Stansport BigXL cots, and with the Therm A Rest they are actually decent to sleep on. Stansport no longer manufactures this model, but it looks like Teton sports makes a similar cot that I will link below.

Honestly I am hoping the airbed will hold up to my weight. 

Second issue is probably related, but I don't function well without coffee. Years ago, we bought a Coleman stove top drip coffee maker, which I love, but am always scared to take camping with me because of the glass carafe. Well, while perusing Coleman for parts and accessories, and double checking on Amazon, we found the Coleman Quick Pot Stainless Steel carafe. Basically a direct replacement carafe but in stainless steel instead of glass. SOLD! No chance ever of it breaking.

Now I know, I can use a percolator, and I do own a stainless steel Texport percolator. But have you ever tasted percolator brewed coffee? While it is certainly better than instant, it is far below my standards.

And the last upgrade / replacement we are going for in regards to camping gear is coffee related again. I have gotten a big taste for Hot mochas and cappuccino, Meaning coffee, sweetener, and frothed milk. Sadly our milk frother at home is glass, and VERY fragile glass at that. So instead we are going to go with a Stainless Steel, or Acrylic frother. I typically don't like anything plastic touching foods or drinks if they get hot, but in the case of the frother, the milk stays cold....

So with this stuff in the inventory, and ready to go, it is time to dig down the rest of the gear, I have a park in mind to camp at, with full, nice bathrooms, water, and power as well as a covered picnic table at the sites. So with that knowledge safely tucked away, time to sort out my lists, sort out the gear, and pack accordingly... 

Soon you will see some video from the trip we are prepping for, and will get video reviews of the gear in question. But until then... Get out there and find your own... road less traveled.

Monday, January 30, 2017

Setting up your camp kitchen, part 1.

To make your meals, you will want to set up a camp kitchen. Assuming you want to eat something more than reconstituted freeze dried backpacking meals and instant oatmeal, or hot dogs and marshmallows cooked on a stick over a fire, this will take a bit of equipment. We will lay out what we use, what is optional,a nd what is a real msut have. What can be substituted if possible.


  1. Camp Kitchen. We use the Coleman Pack-A-Way camp kitchen. It is smaller and lighter than several of its competitors, lacking a few of the luxuries the others offer in favor of a more manageable package. If you can rely on say the tailgate of a pickup, or wherever you are camping having a picnic table you can use, you can omit the camp kitchen and use something like the Coleman Stove Utensil rack.


  2. You will need a washbasin to keep things clean. The Coleman collapsible double wash basin is rugged for plenty of camping trips, and roomy enough to allow you to have a soapy water wash and a rinse basin. They are available in packs just alone or with a nice 4 place enamelware place setting set. (You will of course need dishware right?)


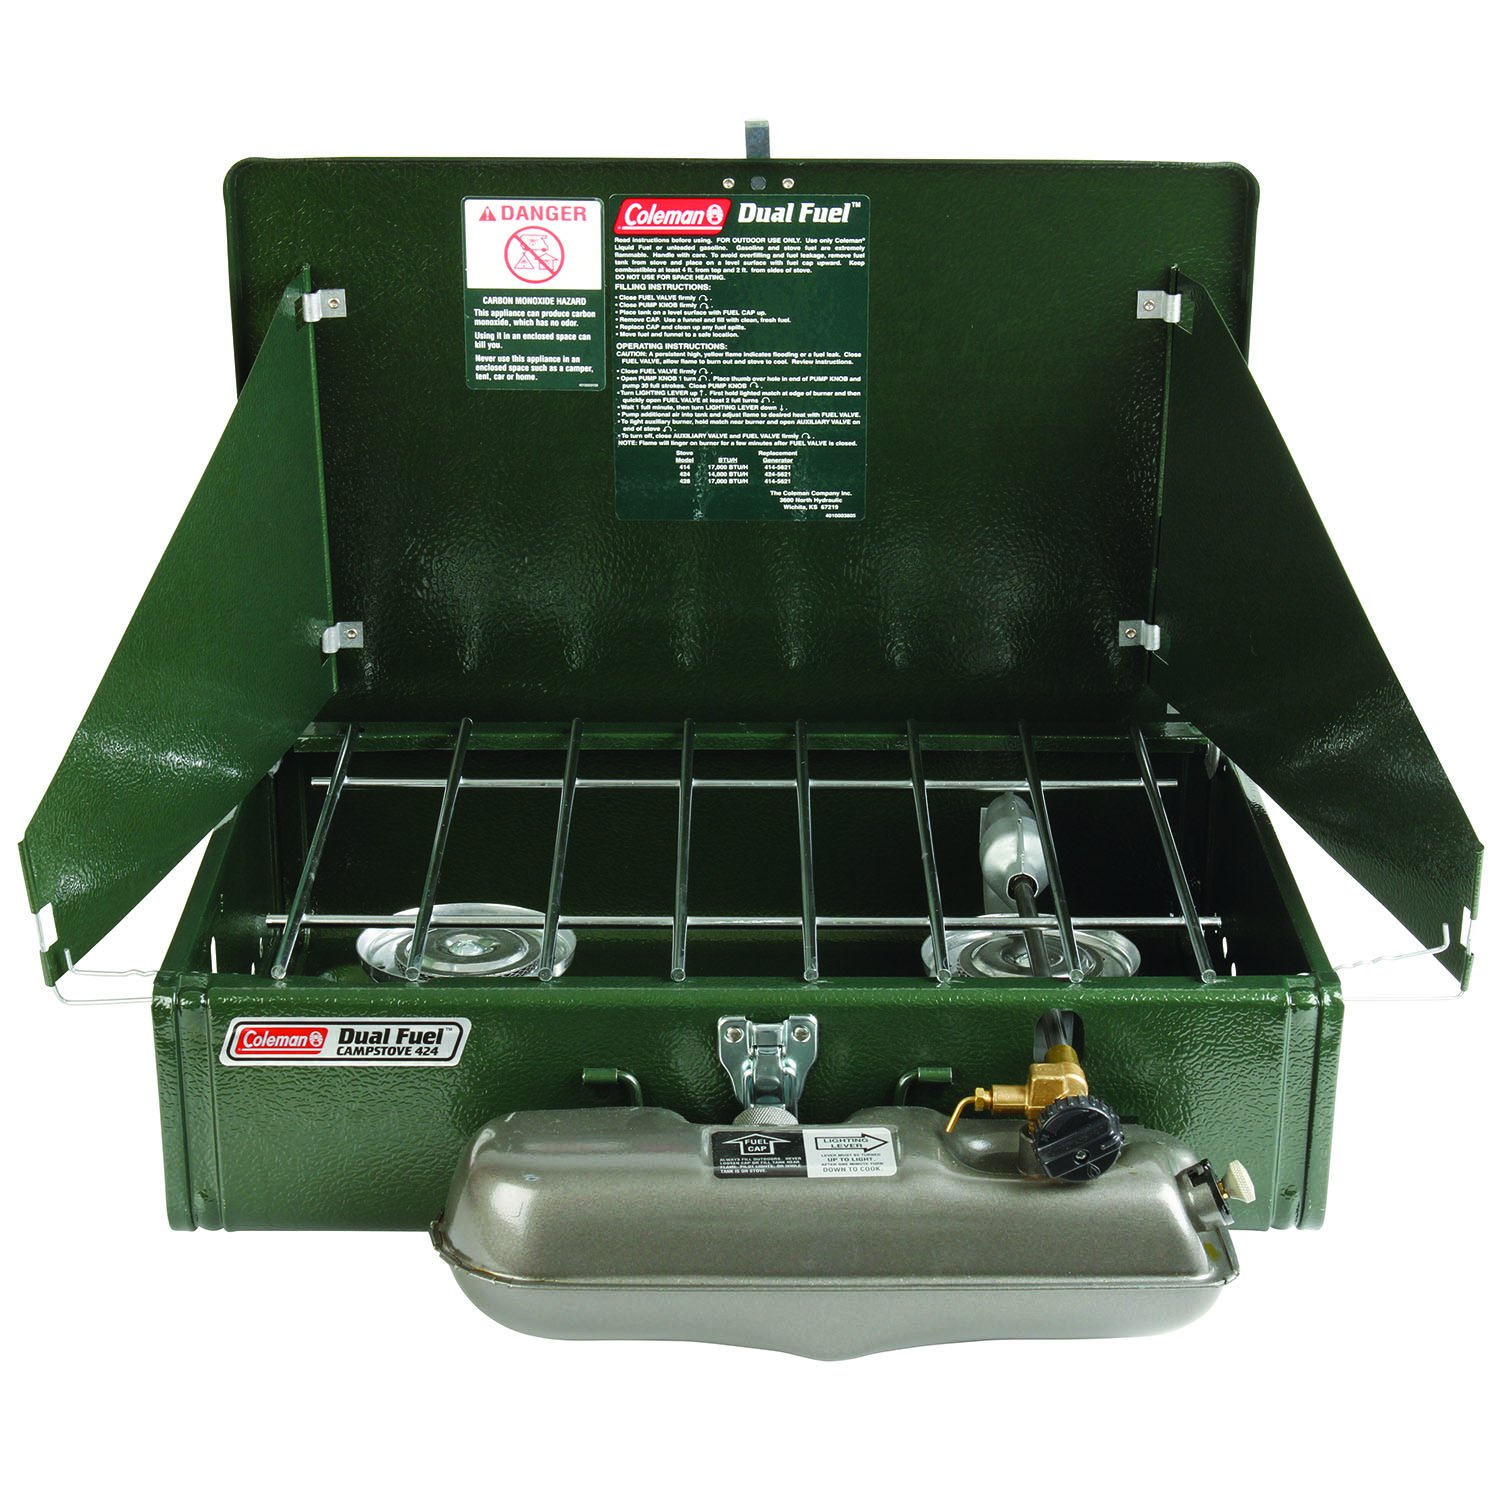
  3. Of course a camp stove is a must have piece of equipment for your trips. We personally prefer liquid fuel stoves. Specifically the dual fuel stoves. We love the ability to run our stove on the same fuel as our vehicles use. The Coleman 424 Dual Fuel 2 burner camp stove. It uses either Coleman White gas / Ozark Trail Camp Fuel, or unleaded gasoline. Aside from the common fuel, liquid fuels, specifically the White Gas, well a gallon of white gas, or unleaded gasoline has the total full on burn time of 4.5 to 5 of those green 1LB propane cylinders. Make no mistake, a 1LB propane cylinder when used up is still considered hazardous waste, And the cost difference over the long run, a liquid fuel stove pays for itself easily Combine that was the fact that liquid fuels will pressurize and work in conditions that a propane stove simply can  not like sub freezing conditions. Something to consider if you are using your stove for winter hunting trips.


  4. You will of course want cookware. There are a couple of schools of thought to this. Stainless Steel sets with copper bottoms are durable and work well. We have one, an Ozark Trail set that is just a rebadged TexSport, it works great, but has problems with heating evenly. If you want even heating, the only real way to accomplish that is with cast iron cookware. I highly recommend if you are going to buy new cast iron cookware, that you buy non seasoned cookwae. Doing so will teach you how to properly maintain cast iron. You will want a dutch oven, a skillet / fry pan, and a sauce pan. A lid lifter is a life saver as well. A very much optional item, but highly recommended is a griddle. And take our word for it, you want cast iron on that. The reasons are that you can cook LOTS of pancakes, eggs and bacon on a griddle super easy. We love ours.


  5. Food storage is critical for any sort of home cooking while camping. A quality cooler is a must. Now most of us can't really afford the Yeti type coolers, And the physical size of them compared to the actual storage capacity, they really aren't at least to us, all that appealing. We have found for long weekend camping, a 50 - 60 quart cooler is ideal. The trick is to get one of those "5 day" coolers that will keep block ice, well, ice for 5 days. There are 2 that are our favorites. The Colmean Extreme 50 quart wheeled cooler, and the Igloo MaxCold Roller Cooler 60QT. The main difference, aside from the 10QT diference in capacity, is the physical format, The coleman is more cube shaped, and the wheels are along the "wide side", it rolls much like a suitcase. The Igloo we favor though. It holds ice a little bit better, rolls easier, and the handle is easier to deal with where it is just a simple swing up handle. With either, we simply take empty 1L plastic water bottles, press a little bit of air / water out so that the sides are slightly sucked in and then freeze them solid. We usually use 10 of them. Simply toss them in when you load the cooler, and you are good to go. No soaking wet of the ice on your food containers! I won't provide links, but food storage containers, the plastic or glass ones with air tight lids Square ones use space much better than round ones. Keep everything air, and liquid tight!


  6. Cutting board, and knives. Another no links. Pick your favorites, just make sure that your knives are kept in a knife roll so that they transport and sstore safely.
There's more to come, but this is going to be a long read. Stick with us and enjoy the list!

Friday, January 27, 2017

Cooking well. Low carb pizzas in camp.

So you are camping enthusiasts like us that need to lose weight. You know getting out in the back country gets you active up and around in beautiful surroundings to the point you are getting a workout in without even noticing it.

All that extra excersize doesn't mean you can eat whatever you want and still expect to lose weight. I know, I tried that route. It doesn't work.

So with the advice of my doctor, and nutritionist, and mind you I am NOT offering up medical advice, just telling you what is working for me.

I don't know about you, But I LOVE Pizza. Particularly ham, pineapple, red onion, and bell pepper. If I can add sun dried tomatoes all the better! But that tends to be heavy in carbs and fat. So I worked up a recipe that is hard to beat that can be done in a Coleman camp oven. (I'd love to do the cauliflower crust but the camp oven doesn't get hot enough...).

What equipment will you need?


  1. Dual burner camp stove. I use a Coleman 424 Dual fuel.
  2. Fuel for your stove. If using liquid fuel a funnel / filter for that fuel as well. If using propane, make sure your stove is compatible with your fuel source. I.E. the Brinkmann 2 burner stainless steel camp stove will be overpressured and damaged bu connecting to a 20lb cylinder. Use only the green small cylinders.
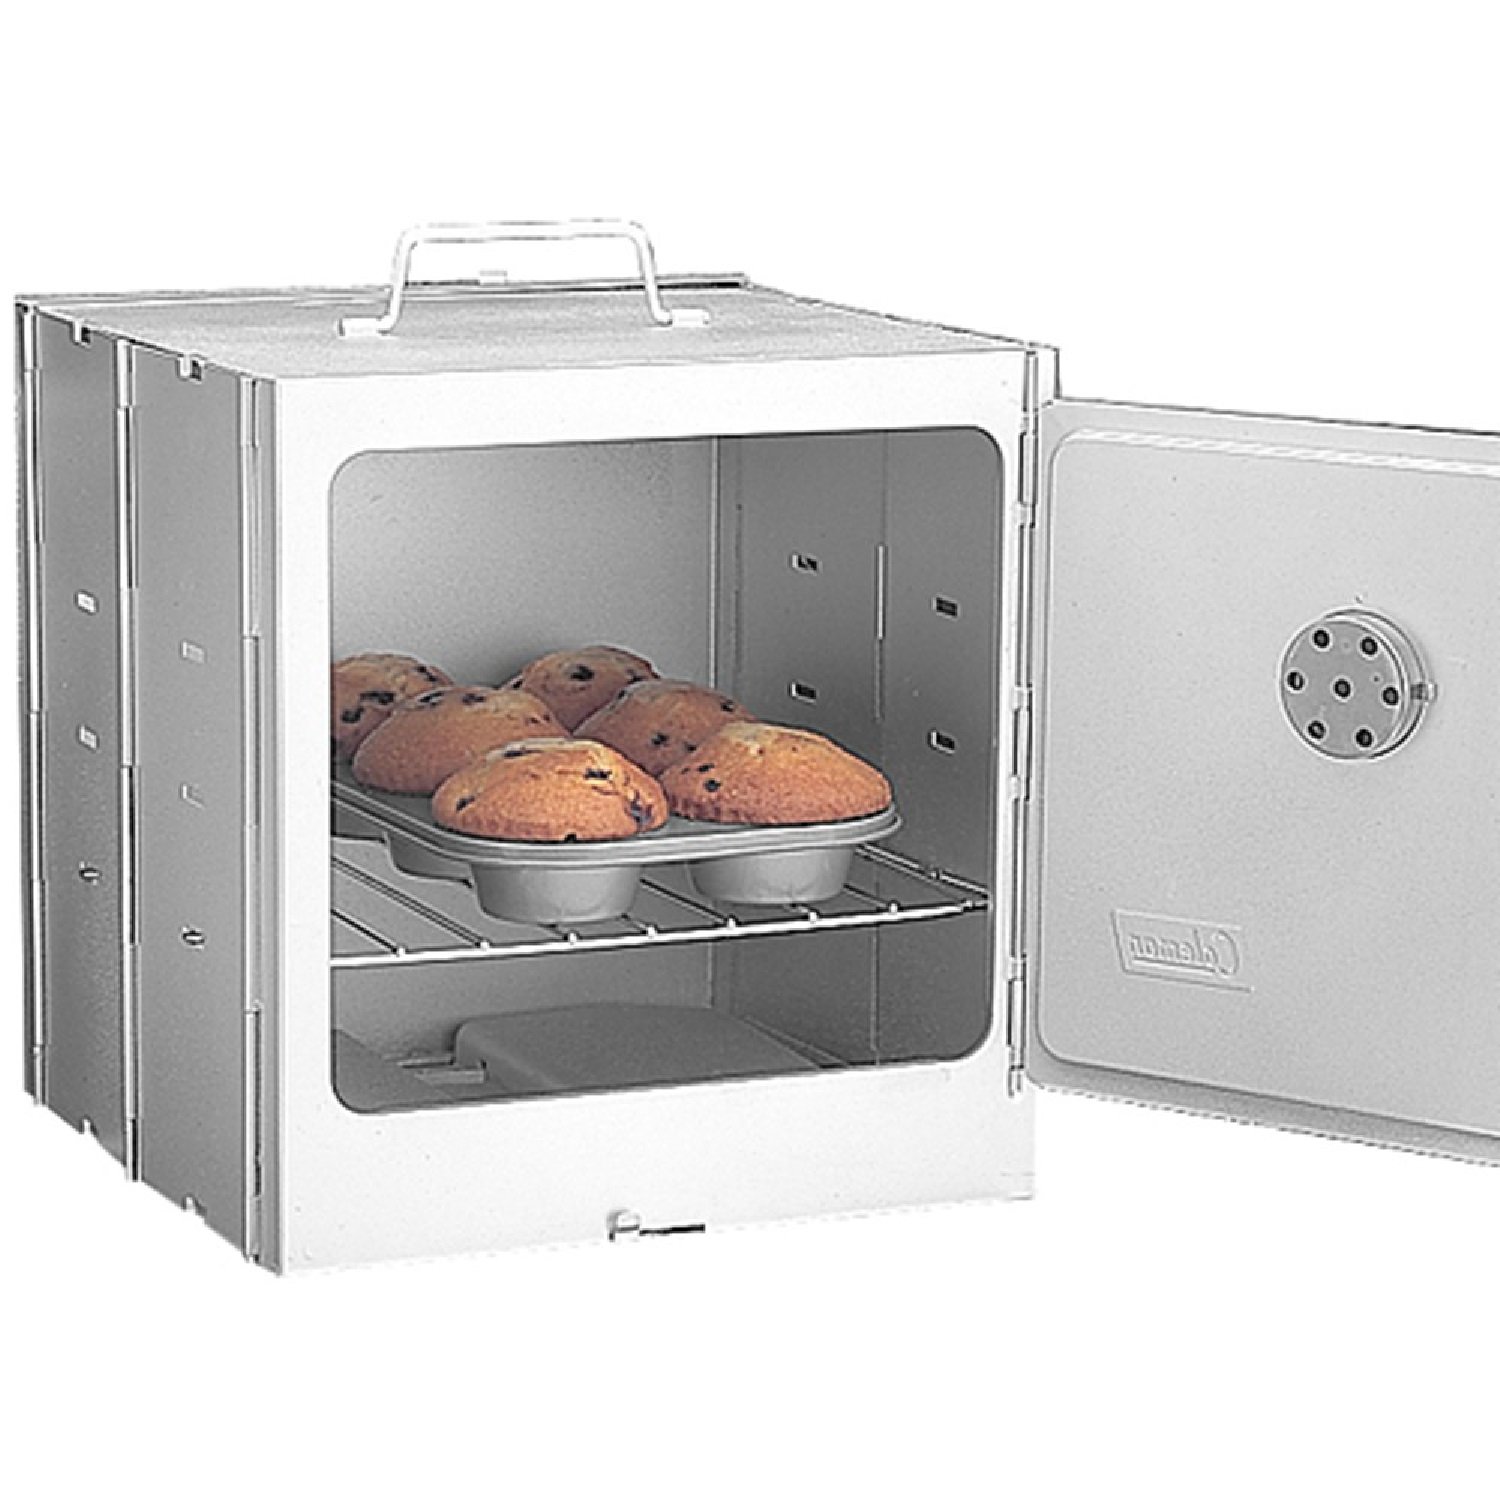
  3. Coleman Camp Oven. There are others, I use the Coleman because, well I have it, and like the way it works.
  4. Aluminum Foil.
  5. Hot pad for removing / adding to the oven.
  6. Mixing bowl.
  7. Cutlery, serviceware etc...
You will need the following ingredients.(We prefer organics, make your own choices) Prep ahead of time unless you are long term camping such as Full time nomads, and long hunting trips. 
  1. Whole wheat tortillas
  2. Canned tomato sauce. 8oz
  3. Garlic powder
  4. Italian Seasoning.
  5. 1/2 cup of 50/50 mix of 2% shredded Mozerella 2% shredded medium cheddar.
  6. Toppings of your choice.We use...
    1. Italian sausage crumbles pre cooked.
    2. Sun Dried tomatoes
    3. Red Onion slices
    4. Bell Pepper slices
    5. chunk pineapple
    6. sliced cooked ham or better yet, Canadian Bacon if you can get it.
Pre heat and stabilize your stove / and oven to 350 degrees F. Place your rack in the middle position. If you are lucky enough to have 2 racks, place one middle, 1 top.

Pour tomato sauce into mixing bowl. Add 1 tbsp Italian Seasoning, and a pinch of garlic powder. Mix thoroughly.

Tear off a piece of aluminum foil sized to the rack of your oven. Do not block the airflow all the way though. Allow about 1" from the sides. 

Place tortilla on the foil, spread your tomato / pizza sauce like a regular pizza, and add a thin layer of cheese. Add your toppings, and another layer of cheese. 

The sandwich of melted cheese when you are done helps keep the toppings from falling off.

Place your pizza(s) in the oven and cook for 15-20 minutes until the cheese is thoroughly melted and the toppings are hot.

Repeat as your dietary requirements see fit.

Serve with a Cesar salad. 

If you don't already have the gear, here are some links for the major pieces of gear. Purchasing from Amazon through our links helps support our efforts. We  really appreciate it.

The camp stove we use mostly is our Coleman 424 Dual Fuel. It is far more fuel efficient than a propane stove and shares a common fuel with our vehicles (regular unleaded gasoline).
The Coleman Camp oven is a great, easily collapsible piece of equipment that makes low carb / paleo cooking in camp MUCH more like cooking at home.

Tuesday, September 6, 2016

It's been a while...

It has been far too long since we have added a blog entry for Wildersport Outdoors, and there is a LOT of good reason for that...

Since I believe it was May this year that our last entry was put in, we have been diving into videography, heavily as we feel that a video blog, or VLOG would be far more engaging than a simple text and photo blog, so we have been going out, taking tons of videos, trying out new equipment, and breaking same said equipment. Some things that we have figured out...

#1. I don't quite know how to not fly a drone into a tree yet. Getting there, and I just finished replacing the drone body and testing it. Thank God for serviceable drones. Replacement parts, and ease of service are 2 of the main reasons we opted for the Horizon Hobby Blade Chroma camera drone, that, and proven compatibility with the SJCam SJ4000 WiFi. I know GoPro is the big name in action cams, but I REALLY like my SJ4000...

#2. Gimbals which are a sort of motorized camera stabilizer, are well worth the money if you can grab one... Thank you Eric Jacobs, A.K.A. the Nomadic Fanatic for the idea, and recommendation on Gimbals. Admittedly ours is the model that replaced his, but so far, no complaints, at least not since flashing the firmware that is!

#3. Having Elderly members of your household, with 2 legs, or 4, means you tend to stay close to home. We have been discovering things about Houston Metro area that we otherwise never would have seen, and we can't wait to bring it to you.

#4. A good number of video editing applications do NOT like AMD / ATI video drivers. We have tried Corel, Adobe, and CyberLink, CyberLink's PowerDirector is giving us the LEAST problems, but is still full of performance issues. Our next laptops are going to have to be Intel withthe  NVidia graphics... That is going to hurt.

#5. Trying to capture video of public places, on major holiday weekends is a fools errand. Just don't even bother. Galveston Island Seawall? Forget it, bumper to bumper traffic and more people than grains of sand it would seem. San Jacinto Monument wasn't any better....

#6. What I thought was a scratch in a waterproof body lens isn't, it is a machining mark. I need to call and get a replacement while I am under warranty.

For what it's worth, I found a good couple of videos on Youtube on how to replace a busted airframe on a Chroma camera drone, neither of which gave me 100% of the information I needed, but given both videos I was able to figure out how to repair the hardware, sadly, calibrating the compass and GPS takes a LOT more info than anything posted.

You see the problem is that the Chroma camera drone comes in a LOT of variants, different transmitters, cameras, or not, gimbal, or not, etc... Our unit is the Chroma with Go Pro ready Gimbal and Spektrum DX-4e transmitter. The manuals for this particular model are lacking in useful info on this. I had to engage Horizon Hobby tech support, which I wanted to mention a couple of things.

#1. Getting a hold of a human at Horizon Hobby isn't easy. BUT they do have a call back service so you aren't waiting for hours burning your airtime on a mobile phone trying to get in touch with someone...
#2. Once you get a hold of a human, they are VERY helpful.

Working with Horizon Hobby support, we found that the manual for the model without a gimbal at all had the info we needed in its manual. So we got that solved.

The remaining issue I have with the Drone is gimbal tilt control.

For now, until I learn what I am doing, and can pass the FAA UAV test, I am going to leave the drone video out of my paid videos, and keep it registered as a hobby drone. I am hoping to change this status before years end...

There is a lot of footage in the queue being processed, and a good deal for you to enjoy, from the mansions of Galveston Island, to the U.S.S. Texas, and San Jacinto Monument just outside of Houston Texas.

As we go along we are working to branch further and further out for you.

So stay tuned, and enjoy what we have to offer!

Tuesday, March 8, 2016

A trip down Texas back roads to find our Blessing....

A day spent with family can although not always is, be a real blessing. And in the case of our weekend country drive with extended family we decided to go and find some Blessing... Blessing Texas that is....

Yep, we found a town on the map with a cute name, and decided since it was close enough to see just what it was all about...

Well, for starters, there will be a video coming, I am slow in processing since my video software is having a conniption fit, and since Extended family in question didn't have a whole lot of sympathy with the whole shooting video for a Vlog, well... I am going to have to do some narration at home in the studio. Weather in League City right now is flatly violent, and any recording I did would sound terrible... But back to the Blessing.

We loaded up the car with myself, my wife, my one of my brothers in law and his wife and we headed out. Making sure to stock up on all the quality healthy road trip snacks, or okay so we slipped off the diet band wagon pretty hard, but Funions are REALLY hard to say no to!

We had the destination of Blessing in mind as it has been one of those that we kept hearing about.... Now typically when I hear repeatedly about a destination, there is usually something worth seeing there, and while Blessing really isn't a whole lot more than a wide spot along the highway, there was a certain charm along what little main drag it had, particularly the Hotel Blessing.

The Hotel Blessing is both charming in its just post turn of the 20th century charm, and with its drab gray exterior, and over a century of wear and an obvious lack of maintenance and upkeep budget,combined with a bit of a cross between Victorian elegance and frontier rustic simplicity of styling, well it had the look of a horror film set for any variety of B movies.

The hotel staff was friendly and answered a good deal of questions about the hotel, and while there was a very distinct lack of modernity, there is certainly the vibe of an old building well connected with Texas history. And for a wooden structure over a century old as close to the coast as this place is, it is miraculous that it still exists period...

The town, what little of it we saw, and perhaps there just wasn't that much to begin with, only a block or two each way off of the highway, and perhaps 2 miles long at most, seemed to be neatly kept, and had a certain charm to it that can only be found in the country. A fact that was made abundantly clear to us as we got caught on the highway, behind a small convoy of rumbling green and yellow behemoths otherwise known as John Deere combines . I guess we should have asked what sort of crops the folks over there grow!

If you are ambling over through Texas State Highway 35, in Matagorda County heading toward the coast, you might just want to stop on in and see what Blessing Texas is all about, you can be sure we will be back to do the driving tour of Blessing, and catch you all up on the history of this unique little town!

Monday, April 13, 2015

A day enjoying the history on display on Galveston Island Texas. Seawolf Park.https://lh4.googleusercontent.com/-ymA8VyjlinA/VSBMIT8d1YI/AAAAAAAAIDM/IrvkPCjZpm0/w1518-h854-no/20150404_151942.jpghttps://lh6.googleusercontent.com/-CL3XLsg9sts/VSBMR3Fm-ZI/AAAAAAAAIDw/wjokBZjIDsg/w1518-h854-no/20150404_152127.jpghttps://lh6.googleusercontent.com/-Z21oauuO9ec/VSBM6Bmfa_I/AAAAAAAAIGQ/t4maqcEMn4U/w1518-h854-no/20150404_153042.jpg

With the "Greatest Generation" that saw the world through the darkest hours of World War 2 and ushered in the modern era slipping away rapidly, it's a great thing that we have museums, and countless books, documentaries and other means to remind the world to never go back down that dark and sorrowful road...

One such spot where visitors can get actually hands on with real honest to goodness World War 2 military hardware is at Seawolf Park in Galveston Texas. 

Seawolf Park, featuring the American Undersea Warfare Center is located technically just north of Galveston, on Pelican Island, and is a memorial to the United States Navy Sargo-class submarine USS Seawolf (SS-197) mistakenly sunk by U.S. Navy forces in 1944 during World War II.

Seawolf park features a submarine, and the remains of a merchant ship, and a destroyer escort designed to conduct antisubmarine warfare all in one museum area. It is the home of two semi preserved U.S. Navy ships, the first as you enter the display area is the Gato-class submarine USS Cavalla (SS-244) and immeidately across the display area, the Edsall-class destroyer escort USS Stewart (DE-238), and the remains of the World War I tanker S.S. Selma, the largest concrete ship constructed, can be seen in the waters northwest of the park '​s fishing pier. Also displayed at the park is the tower of the Balao-class submarine USS Carp (SS-338) and the sail of the Sturgeon-class nuclear attack submarine USS Tautog (SSN-639).

There are facilities for having a picnic, and shore access inside, and out of the park where anglers can fish for common Texas Coastal fish such as Sea Trout, Speckled Trout, Atlantic Drum, Flounder, Gafftopsail Catfish and others. 

A tour through the park, and the naval installations can give the visitor a great understanding of the hardships the Greatest Generation had to go through, lacking in even the most basic modern conveniences and comforts. 

We recently took the trip to Seawolf Park, hopefully this photo tour will give you a feel for what things aboard were like for those that put their lives on the line for liberty...


The road in from the main island leads through Palm trees and sand until it all opens up to a view of a World War 2 era Destroyer escort ship. Quite a sight for sure!


The sign at the entrance gate gives a clue that this isn't your ordinary county park!


As you come through the ticket takers station, the first thing you are greeted by is the business end of a U.S. Navy Submarine, complete withe torpedo being fired, and frozen in time.


As you round the nose of the submarine, and walk between vessels, a beautiful sandstone and cast I believe it is bronze monument stands to honor the fallen.


Words far too many many have come to forget the true meaning of. 

Now we climb aboard the USS Cavala and take a tour aboard a real World War II submarine!


The decking of the Cavala was refurbished since 2000, but already is showing the impact of the harsh marine environment.

As you descend the stairs through the hatch, you immediately enter into the forward torpedo room. 


Thanks to the handy tour signage, we now now how torpedoes were propelled in World War II.

Moving on, let's let the photos do the talking, they say it so much better than I can!


Remember that sign about the Officers Staterooms? Well here they are!


You'd think Officers would have had better quarters, but then again, this isn't meant to be a luxury cruise ship!


Some of the areas of the exhibits, it is obvious that more modern equipment has been installed.


Now this next pic, shows just how much decay happens over 71 years, including a good number of those years, 1944 to 1971 being maintained in active service.... I'm no expert, but I suspect there is a LARGE number of missing valve handles here!


Somehow I doubt the poster in the Crews Mess is original to the sub from 1944.


And that is it for the sub pics for now... In order to keep in manageable, I am going to break this up into pieces that are easier to chew on as it were, so for now...

Get out there and find your own... road less traveled.

Wednesday, March 11, 2015

An Introduction to Tents part 1. Size matters. Big Tents.

So it's springtime in Texas, that means 2 big things to most of our outdoor enthusiasts. Camping, and rain...

It would appear that God had something interesting in mind for outdoorsy folks in the spring when he made Texas. At the time of year the weather is not too cold, but cool enough to sleep in a tent, he threw lots and lots of rain our way just to make things entertaining....

Now there's nothing I like more than to be snuggled up with my wife listening to the rain hitting a taut waterproof rainfly. And there is nothing I hate more than being awakened at 3 A.M. in a torrential downpour only to find a river running through my tent, and the rainfly seam directly over my head leaking a steady stream of water onto my sleeping bag and saturating it and me....

So how do we manage to stay dry and warm when camping in the sog?

It all starts out with proper tent selection...

Let's start off talking about tent sizes.... Now I totally get it that you might want a nice roomy tent to move around in, have a dedicated area to get dressed in instead of trying to slide your pants on while wrestling against an airbed. But let's keep things in perspective. A couple probably doesn't need to be pitching a 10x20 tent for a couple of reasons.

#1. The larger the tent, the more the seams.
#2. The larger the tent, the more the zippers.
#3. The larger the tent, the more the tent is susceptible to the wind, and falling / blowing stuff that can punch holes in it.
#4. And lastly, the larger the tent, the more interior volume you have to either keep warm, or cool... Both are terribly challenging with greater interior volumes.

BUT, there are features found on larger tents that you may find highly desireable such as.

#1. Power Ports. If you camp where power is available, many family tents, and even some cheap models have Power Ports. This allows you to bring in outlets for things like chargers, small fans, or even a small space heater (Be extra, extra, extra careful with those!)  We have a Coleman Sundome 10x10 from about 2004 or 2005 that includes that feature. Very nice to have! We have a GFCI outlet strip that we plug a small portable fan into. We keep a small cooler that is just a spare, that holds a block of ice. We simply open the lid and have the fan blow across the ice. Keeps the test super cold through the night...

#2. Eyebrow windows. These offer the opportunity to have some fresh air flowing through your tent without fresh water falling though the screen, and the downward slope of the window affords you at least a small measure of privacy against those strolling by your tent.

#3. Partitioned spaces / rooms. This is great to allow mom and dad at least a tiny bit of privacy from the kids, or a couple of hunting buddies privacy from each other when it's time to hit the rack... The most popular reason to have a larger tent is in fact to keep families together instead of shoving the kids off in a tent on their own. This can easy many an anxious parent, or child until the child hits their teens and decides, that "Share a tent with mom and dad? Ewwww!"

#4. Higher center ceiling heights making it easier for taller adults to stand up, get dressed etc... in one.

#5. Typically lower cost as more expensive lightweight materials aren't used very often in larger / family sized tents. Not too many aluminum or titanium poles to be found here! Just shock corded fiberglass.

#6. Rugged, easily patchable, and nearly water resistant tub floors. These are typically made of the same stuff that heavy nylon / vinyl tarpaulins are made of. The floors do a great job of keeping water out, unless it is already in, where they do a great job of keeping the water IN.. Not by design of course, but you get the idea...

So you see there is a lot to be fond of in larger tents. Their upsides, depending on the application however, can be a real deal killer in other applications. Nobody is taking a large say Canvas cabin tent backpacking any time soon unless they are training for an ironman competition.  And many older, smaller camp sites just don't have tent pads large enough to pitch a big old tent...

So it's crucially important to keep your party size, level of comfort, and budget in mind when selecting a tent.

Once you are set up, take the next available opportuinty to...

Get out there, and find your own, road less travelled.